How to Use CafeResto: A Complete Restaurant Management Demo
By QuickyTools · Published on
CafeResto is a fully functional café and restaurant management demo that runs entirely in your browser — no login, no server, no setup required. All data is stored locally using your browser’s localStorage, so everything persists between sessions.
It supports English and Spanish, works on mobile and desktop, and includes a dark mode. The perfect way to explore what a real POS system looks like before building or buying one.
1. Table Management 🪑
The Tables tab is the heart of the app. You’ll see a grid of all your tables, each showing its current status at a glance.
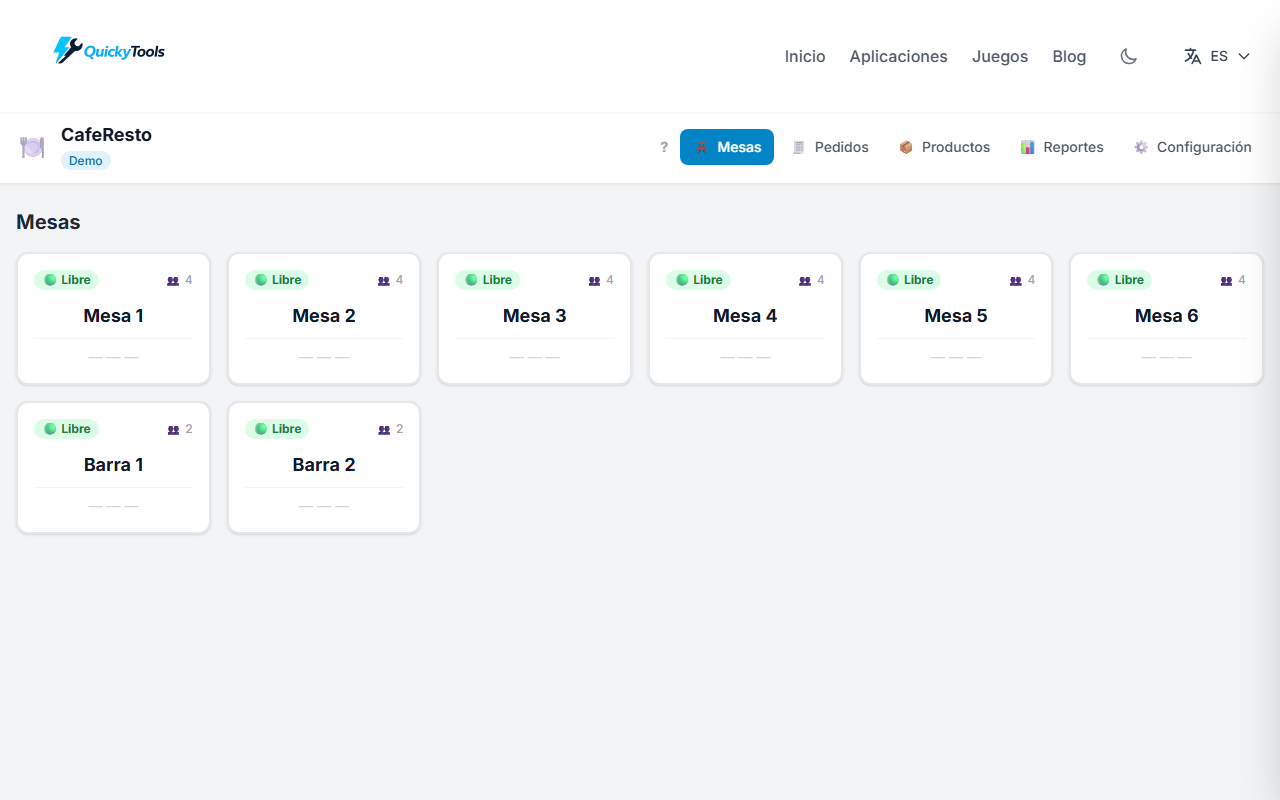
Free tables show a neutral border. Occupied tables display an orange border with the number of items in the active order and the running total.
Click any occupied table to open its detail panel on the right side:
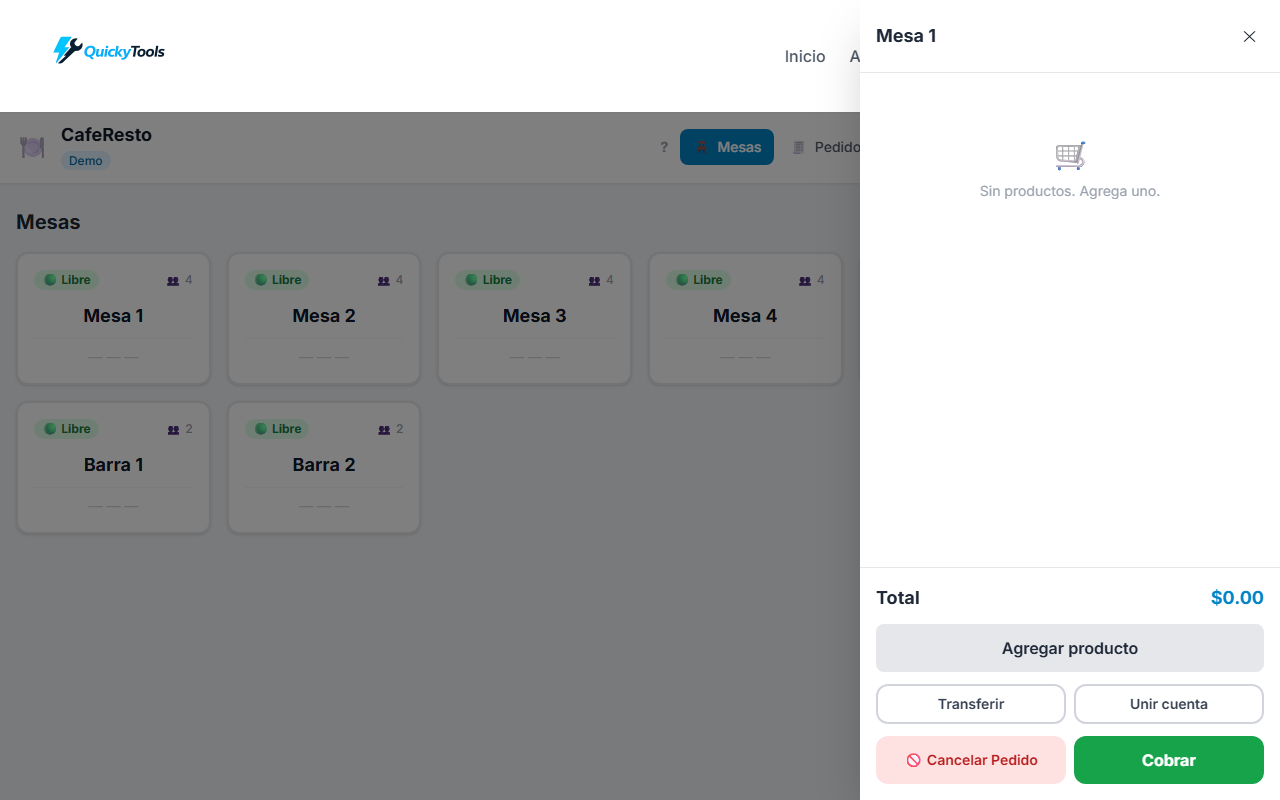
From the detail panel you can:
- Add products to the order
- Transfer items to another table
- Merge this table’s order with another
- Cancel the order — logs the cancellation with a reason in the history
- Checkout — close the order, record the sale, and free the table
2. Adding Products to a Table 🛒
Tap Add Product in the detail panel to open the product selector. You can add multiple products in a single step:
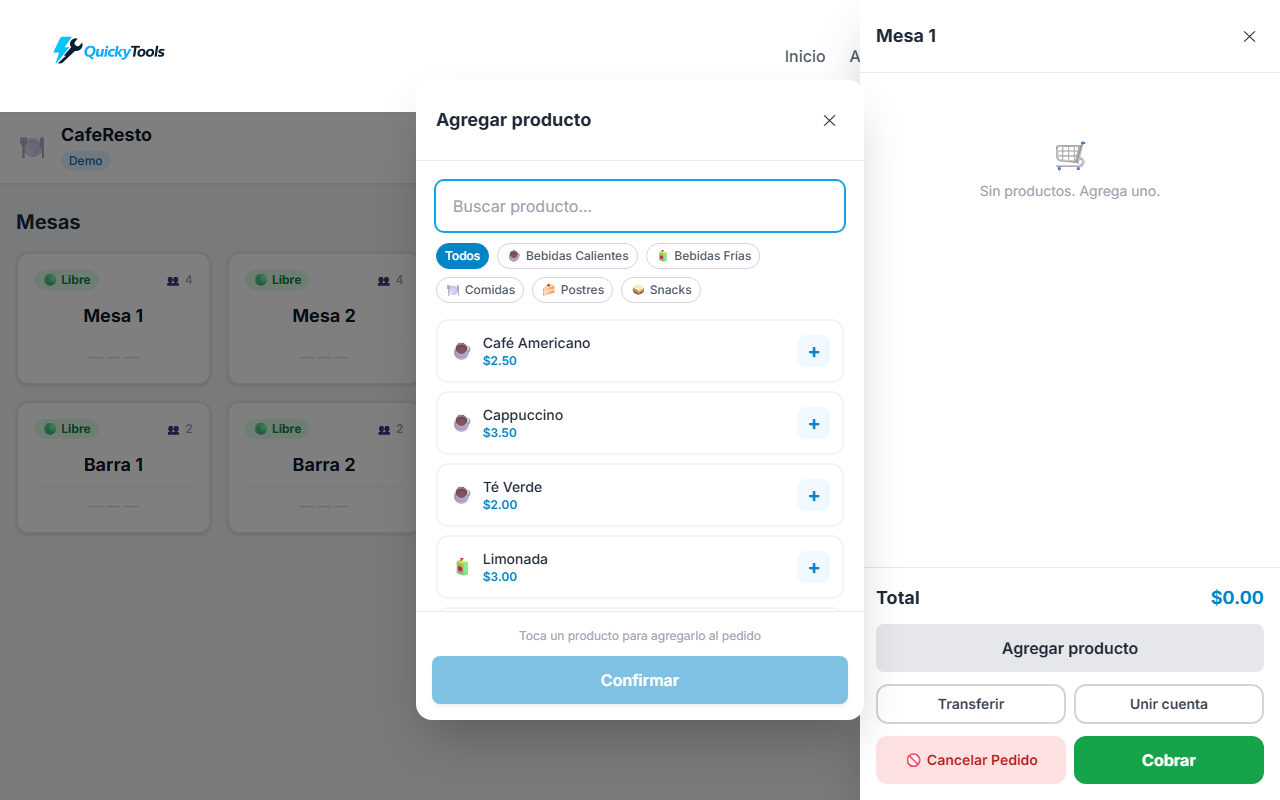
- Search by name using the text field at the top
- Filter by category using the pill buttons
- Tap any product to add it to your selection — a
− qty +stepper appears inline - Adjust quantities for each product before confirming
- The footer shows a live summary: number of products, total items, and total price
- Press Confirm to add everything to the table at once
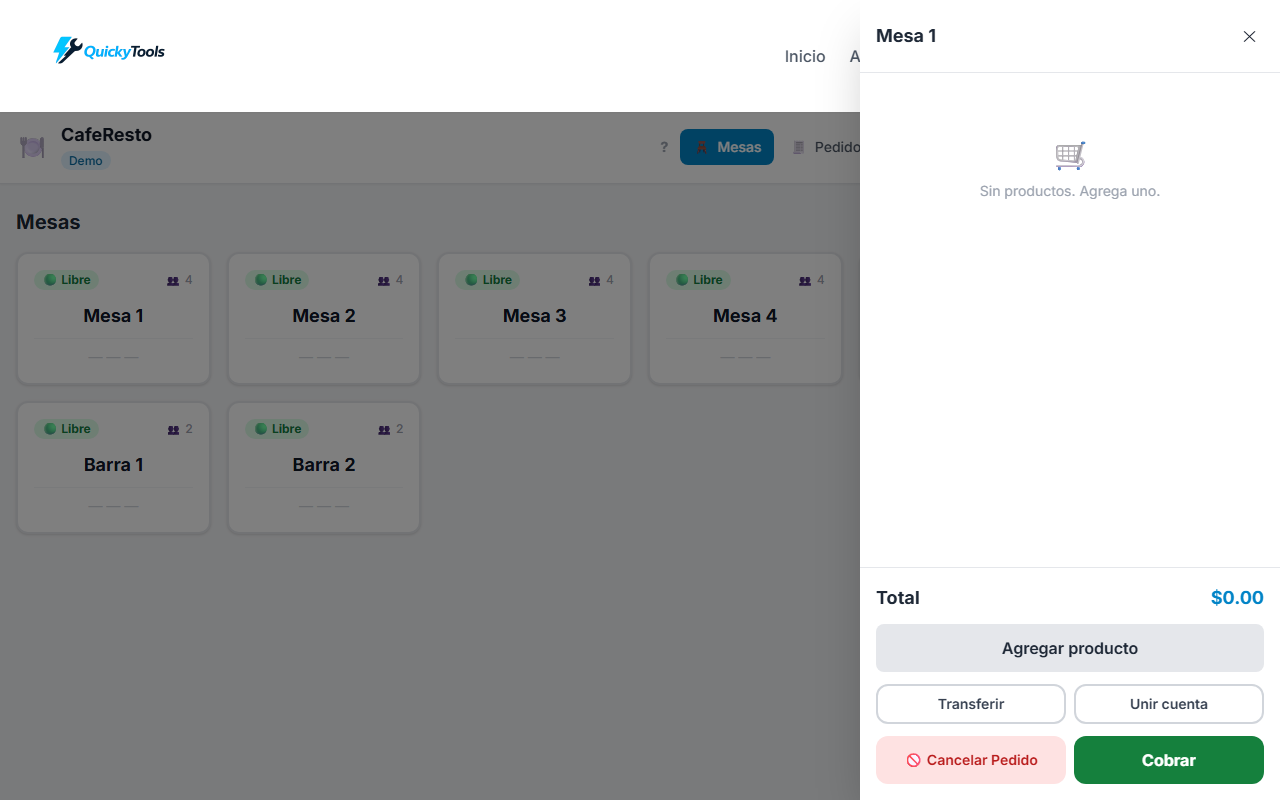
3. Checkout & Payment Methods 💳
Tapping Checkout opens the payment modal with all the methods you’ve configured:
Select a payment method (Cash, QR, Card, or any custom methods you’ve created in Settings) and confirm. The sale is recorded in history with the chosen method, visible later in Reports.
4. Cancelling Orders and Items 🚫
Both table orders and queue orders can be cancelled at any time. From the detail panel:
- Cancel the full order — 🚫 button in the panel footer
- Cancel a single item — tap the × button next to the item; a reason is required before removing it
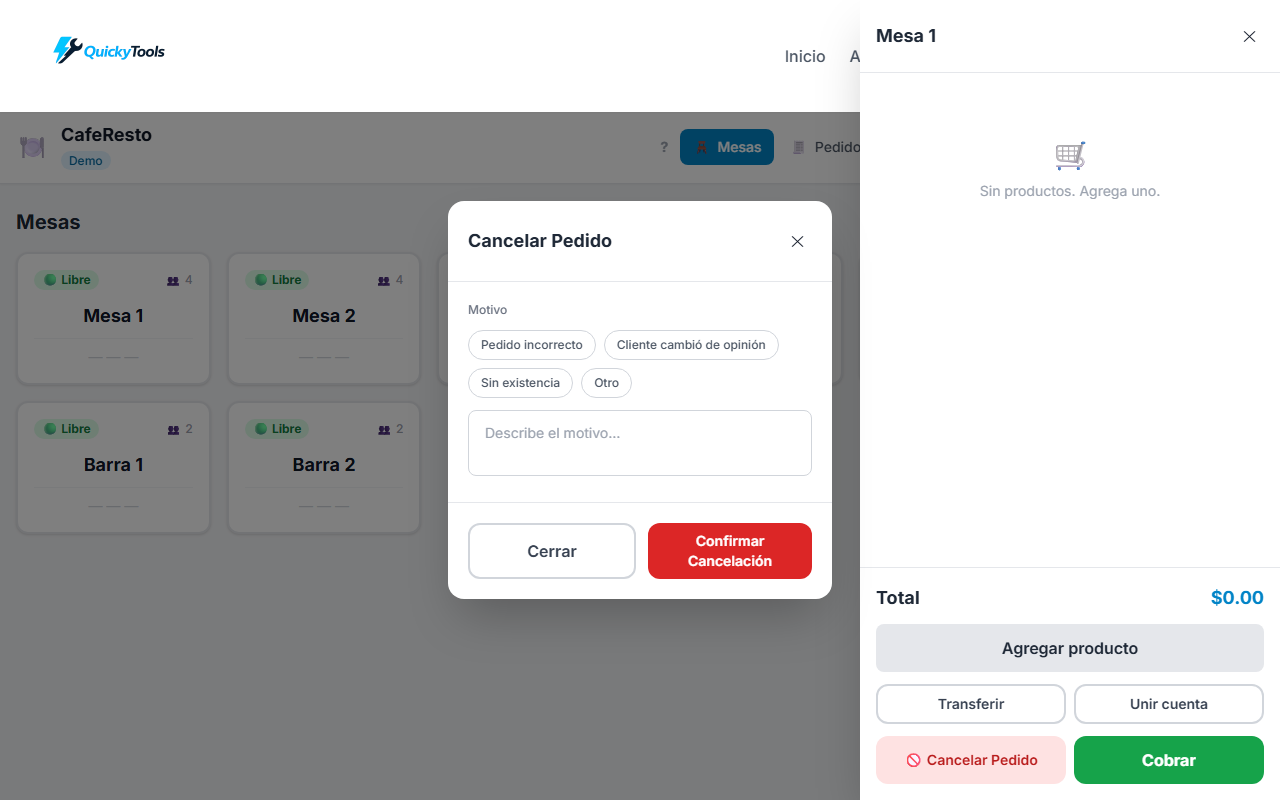
The cancellation modal offers preset reasons (Wrong order, Out of stock, Customer changed mind, Other) or a free-text field. Cancelled records stay in history with an ❌ Cancelled status and the reason visible in Reports.
5. Order Queue 🧾
The Orders tab manages a numbered queue of anonymous orders as they arrive — ideal for counter-service cafés, kiosks, or fast food spots.

Each order flows through three states:
Waiting → Ready → Dispatched (paid)- Create a new order with the New Order button and add an optional note (customer name, reference)
- Add products the same way as a table — reuses the same detail panel
- Mark the order as Ready when it’s prepared
- Tap Dispatch to open checkout and record the sale
- Dispatched orders appear in Reports as
🧾 Order #N
The order counter is cumulative — it never resets, preventing confusion in the history.
6. Products & Categories 📦
The Products tab gives you full control over your catalog.
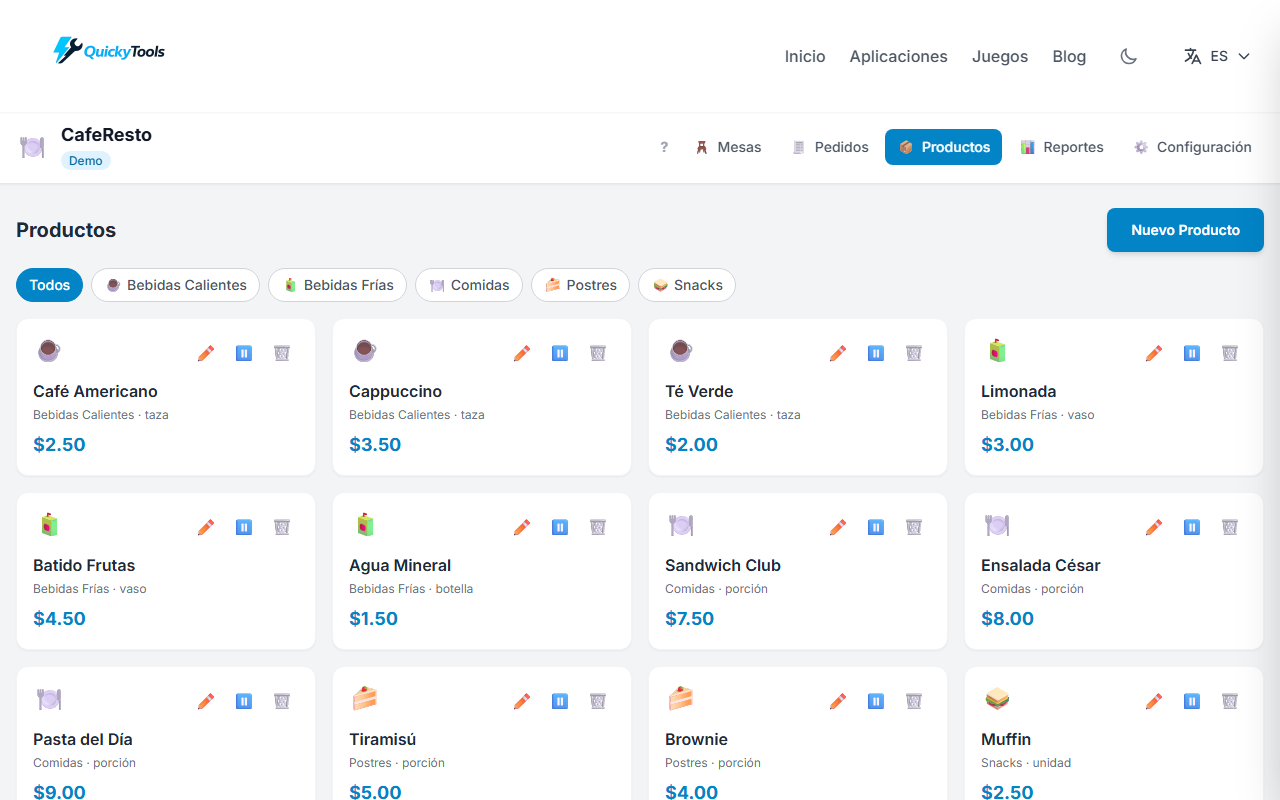
Each product card shows its name, category icon, unit, and price. You can:
- Filter by category using the pills at the top
- Create new products with the
+ New Productbutton - Enable or disable any product with the ⏸️/▶️ button — disabled products are hidden from the order selector, perfect for seasonal or promotional items
- Edit or delete any product using the icons on its card
Products are organized into categories (Hot Drinks, Cold Drinks, Food, Desserts, Snacks by default). Manage categories from the Config tab.
7. Sales Reports 📊
The Reports tab gives you real-time insights into your sales performance.
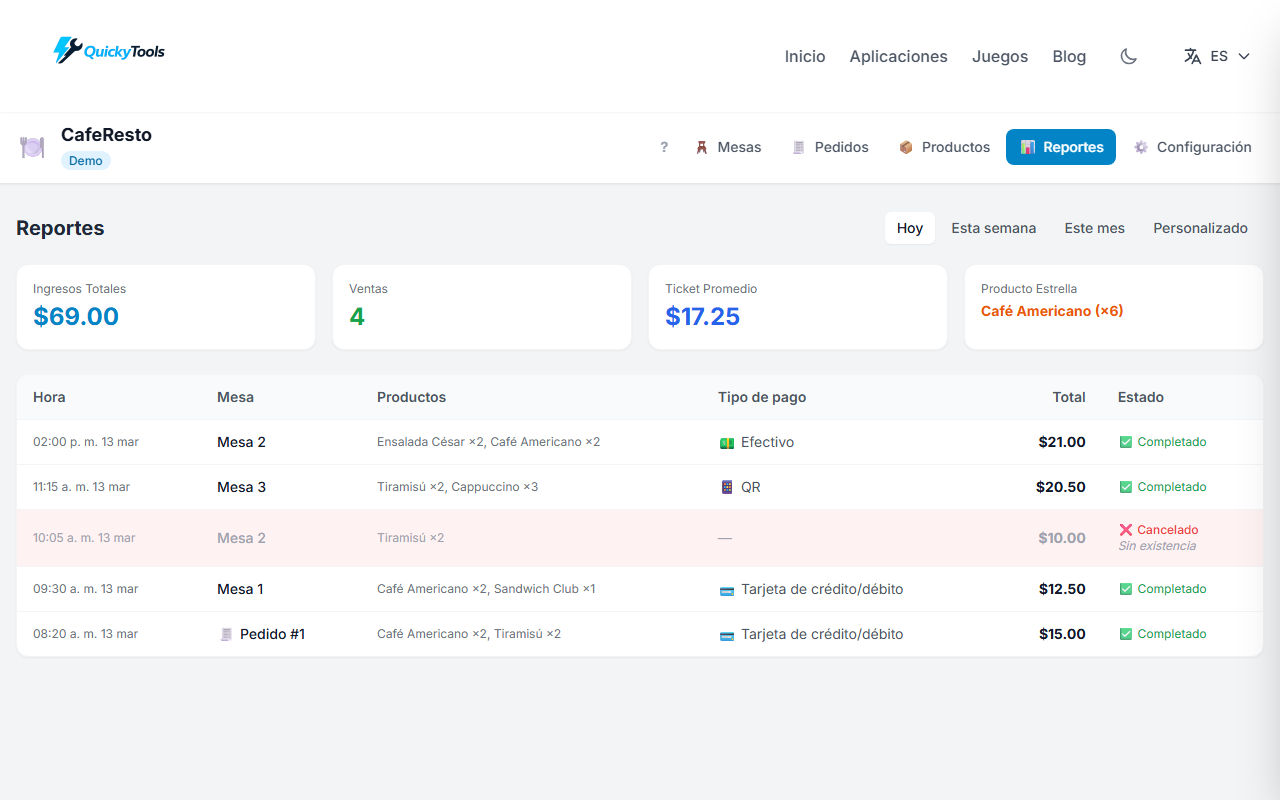
Four KPI cards at the top show only completed sales (excluding cancelled):
- Total Revenue — sum of all completed sales in the selected period
- Sales Count — number of completed orders
- Avg. Ticket — average order value
- Top Product — best-selling item by quantity
The sales table includes a Status column distinguishing ✅ Completed from ❌ Cancelled (with reason shown). The Payment column shows the method used. Cancelled rows are highlighted with a subtle red background for quick identification.
Custom Date Range
Need data for a specific period? Click Custom to unlock the date range picker:
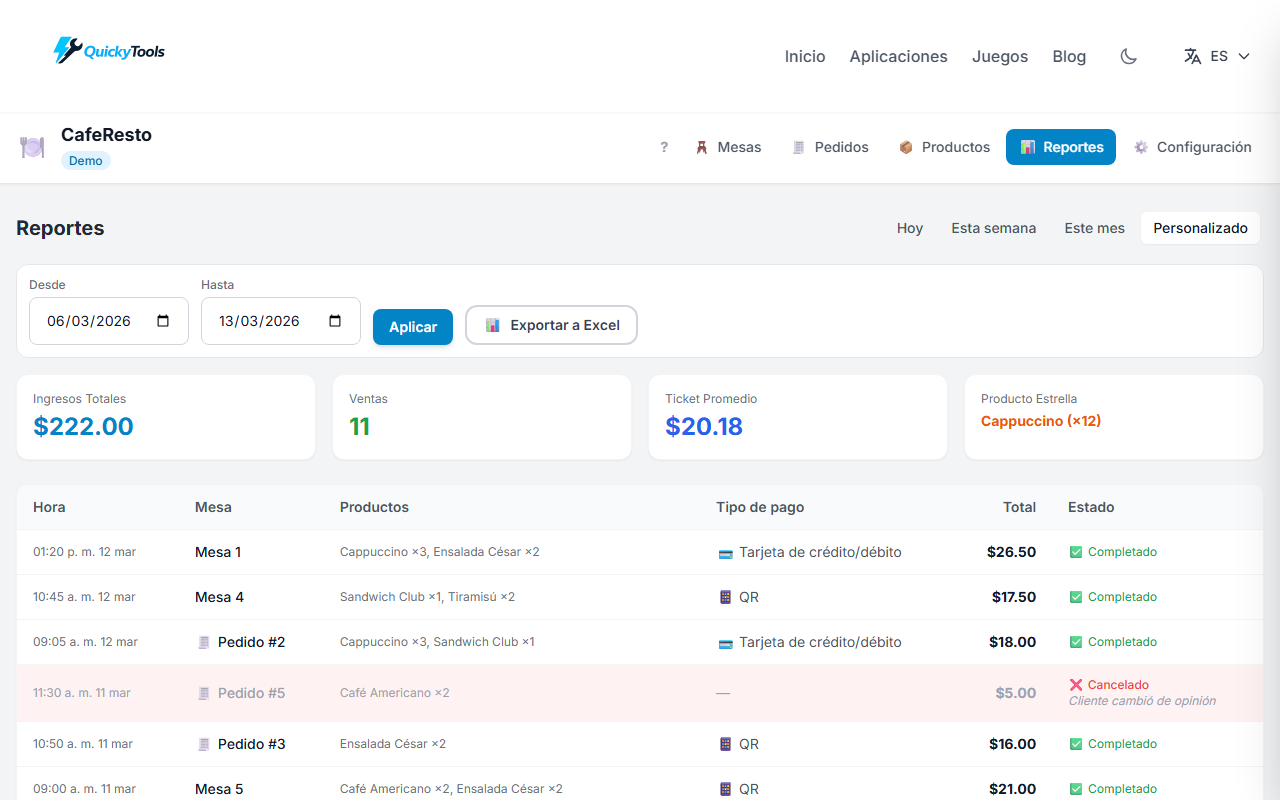
Set a From and To date, then click Apply. Once your range is set, the Export to Excel button generates a .xlsx file with:
- Header with restaurant name and date range
- All sales in the period with columns: Time, Table/Order, Items, Payment, Total, Status, and Cancel Reason
- Auto-filters on all column headers so you can sort and filter directly in Excel
- KPI summary at the bottom (completed sales only)
8. Configuration ⚙️
The Config tab lets you personalize the demo to match any real restaurant.

From here you can:
- Set the restaurant name (shown in the app bar and exported reports)
- Choose the currency (code + symbol)
- Add, rename, or delete tables with custom capacity
- Manage categories with emoji icons (built-in visual picker)
- Manage payment methods — create, edit, or delete methods with a custom emoji and name
- Reset the demo — clears all data and restores the default seed data
Data Persistence & Reset
Everything you do in CafeResto is saved automatically to your browser’s localStorage under the caferesto_* keys. Your tables, orders, products, and history survive page refreshes and browser restarts.
If you want to start fresh, go to Config → Reset Demo. This wipes all CafeResto data and reloads the default seed (tables, products, sample sales history including queue orders and cancelled records).
Ready to try it? The demo is live and free — no account needed.